Just got a new Tesla and wondering how to set up charging at home? This Tesla Charging Setup Guide walks you through everything you need to know.
We cover everything from choosing between a Mobile Connector or installing a Wall Connector for faster charging to managing battery settings through your car’s touch controls.
Whether you're a first-time EV owner or upgrading your setup, this guide is simple.
Avoid common pitfalls during charger installation by consulting our Tesla Charging Setup Guide—your go-to resource for best practices.
Tesla Charging Setup Guide: What You Need to Know Before You Start
Understanding the different charging options and compatibility with your Tesla model is crucial for an efficient setup.
Knowing the location of the charging port and types of cables can save time and prevent inconvenience.
Level 1, Level 2, and Supercharging – What's the Difference?
There are three main charging levels for Tesla vehicles.
Level 1 charging uses a standard 120V household outlet and is the slowest option. It's suitable for overnight charging if you drive short distances daily.
Level 2 charging involves a 240V outlet and offers faster charging speeds, making it ideal for home charging setups. This level typically requires the installation of a dedicated outlet or charging station.
For the fastest option, Level 3 charging or Tesla's Supercharger network provides ultra-fast charging. Superchargers are widely available and can replenish significant battery levels quickly, which is perfect for long trips.
They use DC Fast Charging technology, allowing you to get back on the road quickly.
Tesla Models & Charging Compatibility
Tesla offers several models, including the Model 3, Model Y, Model S, and Model X, each with different charging capabilities. Verifying that your chosen charging option is compatible with your vehicle is essential.
Most North American models can use the Tesla plug, but in Europe and some other regions, you'll need a CCS adapter.
The Tesla adapter ensures compatibility with multiple charging networks, providing more charging options. Ensure your setup matches the model's requirements for efficient and safe charging.
Charging Port Location and Cable Types
The charging port location can vary, so check your Tesla model for placement. Generally, it's located near the rear taillight for easy access. Familiarize yourself with the different types of plugs and cables available.
North American Teslas typically use a proprietary plug, while European models may require a CCS Combo. Cable length and connector types can also differ, so consider your charging station's setup. Key cable types include:
- Standard Tesla connector
- CCS Combo for broader compatibility
Ensure your cable setup supports your charging needs for convenience and efficiency.
Check Out Related Products
Installing Up Tesla Charging at Home
Setting up Tesla charging at home can make your EV experience more convenient. Two main options are using a standard wall outlet for basic needs or installing a Tesla Wall Connector for faster charging. Consider installation requirements, costs, and how to select the right electrician.
Option 1 – Using a Standard Wall Outlet (Level 1)
The slowest charging option is using a standard wall outlet, typically adding about 3-5 miles of range per hour. This solution is best for drivers with low-mileage needs, such as those who drive short distances daily.
To use this option, simply plug your Tesla charging cable into an existing outlet, preferably one dedicated to charging your car. This requires no additional installation, making it cost-effective for those with minimal charging needs.
Option 2 – Installing a Tesla Wall Connector (Level 2)
A Tesla Wall Connector provides faster charging, adding up to 44 miles of range per hour. It's WiFi-enabled, allowing for updates and monitoring. This setup also supports power-sharing if you have multiple Teslas.
Installation involves mounting the connector to your garage wall and connecting it to your home's electrical system. This choice is ideal for households with higher mileage needs and multiple electric vehicles.
Installation Requirements and Costs
Ensuring your electrical system is ready is crucial. You might need a 240-volt connection and a dedicated circuit breaker—typical costs for installing a Wall Connector range from $750 to $2,000.
Local permits may be necessary, and installation must comply with building codes. Consulting with an expert ensures all requirements are met and helps avoid legal issues later.
Choosing an Electrician
Hiring a qualified electrician is key to a successful installation. Tesla provides a list of Tesla Certified Installers familiar with the specific requirements of installing a Tesla Wall Connector.
When selecting an electrician, ask about their experience with similar installations, request a quote, and ensure they can handle any necessary permits.
A good electrician will ensure the safety and reliability of your home charging setup.
Tesla Charging Setup Guide for Apartment or Condo Living
Living in an apartment or condo with a Tesla can be challenging, but plenty of charging options exist.
Getting Permissions:
- Talk to your building manager about installing a charging station.
- Present necessary documentation for approval for an Electric Vehicle Supply Equipment (EVSE) installation.
- Use Tesla's templates to begin this conversation.
Wall Connector Sharing:
- Collaborate with neighbors to share a Tesla Wall Connector.
- Set up schedules to manage shared charging access.
Portable EVSE Options:
- Consider using a plug-in 240V portable EVSE.
- If possible, keep a 240V outlet installed in your garage or parking space.
Public Charging:
- Utilize nearby public Level 2 charging stations.
- Use maps and apps to find and reserve a charging spot close to home.
- Some apartment complexes already have shared chargers for residents.
By exploring these options, you can ensure your Tesla stays charged and ready, even if you don't have a dedicated home charger.
Using the Tesla Supercharger Network
The Tesla Supercharger Network lets you charge your Tesla quickly at various locations. To make the most of this network, learn how to find a Supercharger, understand the costs involved, and prepare your vehicle for charging.
Finding a Supercharger
With Tesla Navigation, finding a Supercharger is simple. By entering your destination, Tesla's Trip Planner will guide you to nearby Superchargers along your route. This feature calculates the most efficient stops.
The Tesla Supercharger site can be helpful for further details. It offers maps of all Supercharger locations, ensuring you never run out of options.
How Much Does Supercharging Cost?
The cost of using a Supercharger may vary based on location. They are usually charged per kWh or per minute. You can check the pricing of individual locations through the Tesla app.
Idle fees are something you want to avoid. Tesla charges these if you leave your car parked after charging at busy stations. Set a reminder on your phone and move your vehicle as soon as you're done charging.
Preconditioning Your Tesla Before Charging
Understanding V2 versus V3 Superchargers is key. V3 Superchargers offer faster charging, up to 250 kW. This means less time waiting to reach a full charge.
Preconditioning your battery is essential for optimal charging speed. Before you arrive at a Supercharger, enable the feature by setting your destination in the Tesla Navigation system. This prepares your battery for top performance, ensuring you spend less time charging.
Following these tips will help you efficiently use the Tesla Supercharger Network, enjoying faster and more convenient charging on your journey.
Smart Charging Tips for Efficiency and Battery Health
Carefully managing how you charge your Tesla can help extend battery life and improve efficiency. Here are some valuable tips:
-
Charge to 80%: Regularly charging your Tesla to 80% instead of 100% helps maintain battery health. It reduces long-term stress on the battery cells.
-
Scheduled Charging: Set your Tesla to charge during off-peak hours when electricity rates are lower. This saves you money and eases the load on the grid.
-
Battery Preconditioning: In cold weather, precondition the battery before driving. This means heating the battery while the car is still plugged in, improving performance and efficiency.
-
Regular Top-Offs: Frequent smaller charges are better than waiting for the battery to get very low. This keeps the battery healthier over time.
-
Mobile App: The Tesla mobile app monitors and controls charging settings. It's a convenient way to ensure you’re optimizing charging times and battery levels.
Charging your Tesla doesn't have to be complex, but doing it smartly can make a big difference in your vehicle's performance and battery longevity.
Tesla Charging Setup Guide for Travel and Road Trips
When prepping for a road trip in your Tesla, it's important to plan charging stops carefully. The Go Anywhere tool can help you map out your route and find convenient Supercharger locations.
Planning Your Route
- Start by selecting your vehicle configuration.
- Add your start and end locations to map out the best charging route.
- Consider including buffer range stops to avoid running low on power.
Charging Stops
Using Tesla's Supercharger network ensures faster charging on the go. Select the next Supercharger as your destination to precondition the battery for optimal speed.
Must-Have Accessories
Prepare for your trip with essential accessories:
- Adapters: These are Necessary for different types of charging stations.
- Cables: Keep both long and short cables for flexibility.
- Power Banks: Handy for charging other devices on the road.
Useful Apps
Consider apps beyond Tesla’s for additional support:
- PlugShare: Identifies available charging stations.
- A Better Routeplanner: Offers detailed trip planning with charging times and stops.
These steps will help ensure a smooth trip with better range management and charging efficiency.
Final Thoughts
Setting up your Tesla charging station correctly ensures faster, safer, and more efficient charging at home or on the go.
From choosing the correct charger to understanding power requirements and installation tips, a solid setup makes daily charging hassle-free.
The right tools and accessories can make all the difference in installing a Level 2 charger or optimizing an existing setup.
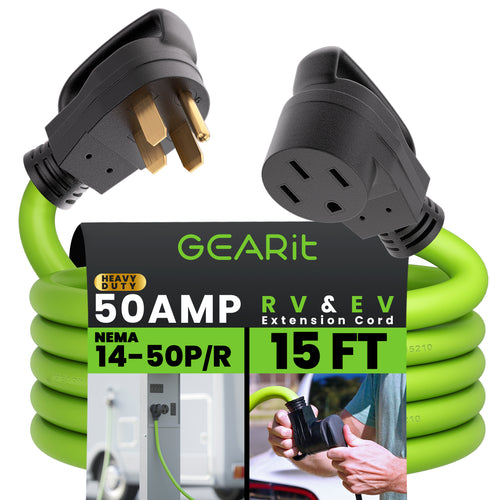
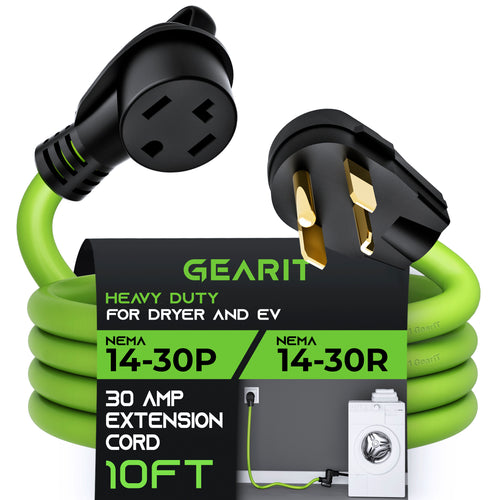
To get the most out of your charging experience, explore GearIT’s Tesla Charger Extension Cord—a reliable, heavy-duty solution designed to extend your reach without compromising safety or performance. Perfect for flexible home or travel charging.
You Might Also Like
Frequently Asked Questions
Understanding how to set up and use a Tesla charger is important for maximizing convenience and cost efficiency. Learn about installation, costs, and other essential considerations here.
How do I install a Tesla Wall Connector at home?
You need to hire a licensed electrician to install a Tesla Wall Connector at home. The electrician will ensure the installation meets local electrical codes and can handle the power requirements. Tesla provides a list of recommended electricians on their website to help you find a qualified professional. (Read more: 🔗How To Charge My Tesla at Home)
Is charging at home cheaper than Supercharging?
Yes, charging at home is generally cheaper than using Tesla Superchargers. Home electricity rates are usually lower than the rates at Supercharger stations. This makes home charging a more cost-effective option for daily use.
How long does it take to fully charge a Tesla?
The time it takes to fully charge a Tesla depends on the model and the charging method. Using a Tesla Wall Connector, it typically takes about 8-12 hours to fully charge. Superchargers can charge a Tesla to 80% in about 30 minutes, but the last 20% takes longer to protect the battery.
Can I use solar panels to charge my Tesla?
Yes, you can use solar panels to charge your Tesla. By installing a solar energy system at home, you can generate your own electricity and use it to charge your vehicle. This is an eco-friendly option that can reduce your overall energy costs.
What happens if I leave the charger plugged in overnight?
Leaving the charger plugged in overnight is safe and convenient. Tesla vehicles are designed to stop charging once the battery is full, so there is no risk of overcharging. This allows you to have a fully charged car ready to go in the morning.


