If you want to get the best performance from your audio system, whether it is your home surround sound, car stereo, or professional audio equipment, knowing how to connect a speaker wire safely and efficiently is a valuable skill. This brief but thorough guide will walk you through the steps. By starting with a basic understanding of the process and moving into connecting specific equipment, you will soon be connecting speaker wiring like a professional.
Identifying Positive and Negative Speaker Wire
Before you connect anything, you must identify the positive and negative wires. A positive wire connects the positive output on one device to the positive input terminal on the other. Likewise, the negative wire connects to the negative input and output.
To identify the positive wire, look for these features:
- -It is copper or gold, while the negative is typically silver.
- -The insulation will be red or some other color.
- -It will have a printed label on the insulation.
- -The wire cover will have a stamp or mold.
Sometimes the print or stamp can be as simple as a "+" sign, making it difficult to read. If this is the case, look closely under a bright light or magnifier to ensure you identify them correctly.
Extending Speaker Wire
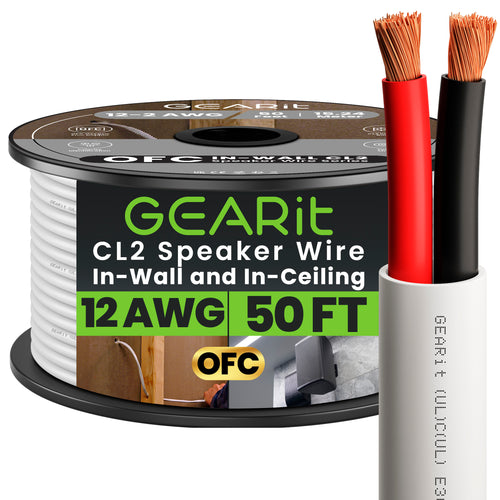
Speaker wiring comes in various lengths to accommodate its versatile use. For example, you can order this 14-gauge copper-clad aluminum wire for home theaters, car speakers, and more in lengths of 50 to 500 feet.
If you have the wrong length or need to add length to an existing wire, here are two ways to connect multiple wires to extend them.
Connecting With Crimp Terminals
Splicing speaker wires using crimp terminals is a reliable method for extending wiring. It only takes a few minutes to complete, and you can do it virtually anywhere with the right tools. If you have a crimping tool with stripping gauges, follow these simple steps:
- Cut the wire. Using your cutting pliers, insert the wire and squeeze until it lightly snaps.
- Strip the wire. Place the cut wire into the wire gauge hole and hold tightly as you pull the wire out, removing the insulation and exposing between 3/8" and 1/2" of the bare wire.
- Attach the crimp connectors. Twist the exposed wire tightly before inserting it into the crimp connector on both sides. Place the crimp connector into the crimp part of the tool and press down firmly to crimp the wire in place.
A crimping tool is an all-in-one piece, allowing you to cut, strip, and crimp. You can also use utility scissors or wire-cutting pliers to cut and strip the wire, then use needle nose pliers to crimp the connector.
Connecting by Soldering
The most reliable way to splice a wire is to solder it. Soldering uses a metal alloy to fuse together other metals. First, cut and strip the wires, leaving a minimum of a half-inch exposed. Then, hold both ends together in an "X" formation and twist them together until they are completely wrapped around each other.
Next, warm up the wire with your iron for only a few seconds and apply solder all around to ensure it flows through. Finally, allow the wire to cool and wrap it in electrical tape or tubing that shrinks with heat.
The entire process takes roughly 10 minutes. Remember, it is important to cover the exposed wire completely to avoid short-circuiting.
How To Connect a Speaker Wire to Different Equipment Terminals
Now that your wires are the correct length, you are ready to connect them to your equipment. The most common terminals are binding posts, banana jacks, and spring clips. You may see these in home and car speakers, subwoofers, and amplifiers.
Binding Posts
Most home audio amplifiers and receivers use a binding post to connect speaker wiring. To connect, you first strip the wire's end in the same way as for extending a wire. Then, loosen the twist tops from the binding posts, which are typically color-coordinated and labeled with the correct symbol to identify where to attach positive and negative wires. Insert the exposed wire into the correct terminal and twist the top back down to keep it in place.
Banana Plugs
Some receivers require banana plugs, which keep the signal strong and make unplugging easier. They have two parts: the prong where you place the wire and the sleeve that screws onto the prong. These Flex Pin Banana Plugs from GearIT use dual-side screws to keep the wires secure for a better signal.
Follow these steps to connect your wire to the banana plug before connecting to the speaker:
- 1. Unscrew the sleeve from the prong.
- 2. Strip the wire, exposing half an inch of wire, and slide it into the prong until you feel it connect.
- 3. Screw the sleeve back onto the plug and tighten it.
- 4. Repeat the process for both sides.
Now you can plug and unplug your speaker wires easily and protect the exposed wire.
Spring Clip Terminals
The most common terminals use a spring clip. You find them in most amps, stereos, and speaker boxes. As with the other connection methods, you start by stripping the wire of insulation and twisting it tightly. Then, push down on the clip next to the hole where you insert the wire, and push the wire in until it fits well. When you release the clip, it will hold the exposed wire in place.
If you prefer to avoid bare wires, you can use a pin connector. A pin terminal is similar to a banana plug, and the process of connecting it to a wire is relatively the same. It has a small, pin-like tip that plugs into the clip terminal where the wire would typically go, stabilizing the connection and signal.
Connecting Speaker Wire With the Right Equipment
When you have the right tools for the job, it makes connecting speaker wire easy and enhances the performance outcome. Before you start the process, gather all the equipment you need from a trusted vendor specializing in audio and video tools. For quality indoor and outdoor speaker wiring, check out the selection from GearIT.


